When it comes to replacing a window (in a wood-framed building), there are basically three ways of doing it:
1) Remove and replace the entire window including frame
2) Remove only sash, replacing it with an entirely new sub-window
3) Replace only the glazing (i.e., re-glazing)
Option 1 requires the removal of some siding material. My
Pella is an example. Option 2 avoids such mess (of cutting the siding material), but the new window has to be smaller because its frame (holding its sash) fits within the old frame. These are often called "retrofit" or "replacement" windows, and they either have a wide flange (sometimes called "flush fin") on the outside that hides the large seam, or installs using a Z-channel. Option 3 keeps the entire existing operating mechanism, and is more common with solid wood double-hungs.
 At my side yard location, I wanted low-priced vinyl retrofits. The existing windows were the ubiquitous aluminum-framed single-glazed sliders. On this facade, ease of installation was important. I didn't want to bother with cutting and patching stucco. At my side yard location, I wanted low-priced vinyl retrofits. The existing windows were the ubiquitous aluminum-framed single-glazed sliders. On this facade, ease of installation was important. I didn't want to bother with cutting and patching stucco. |
Certainteed became an easy choice.
Milgard was also on top of my list. These two are considered the best in vinyl by designers and builders alike, but their product lines actually differ enough that it's not exactly like comparing apples to apples. It might be more like comparing apples to apple-pears.
While Milgard has a broader line and greater presence in the SF bay area (due to a local factory), their reputation or "quality" is based mostly on service and prompt delivery. Certainteed is higher-rated in construction and performance (by
CR among others), but nominally just for their custom line, which caters mostly to small orders. They have purportedly opened a new Northern Cal factory to produce simpler, lower-priced windows to compete with Milgard on larger output like tract developments, multi-family and other new construction. But the word has been to look for those "made in Corona, California," which is their plant that produces the custom line. Milgard, on the other hand, has their own top-of-the-line (fiberglass) to leapfrog Certainteed in performance and durability, and, in many ways, it's the best in its class — with a price to match.
I also looked at
Anlin, which is a retrofit window installation company where they bundle everything as a full-service deal -- removal, replacement and cleanup that takes just a few minutes per window — often not even touching your interior blinds or curtains! The downside is that their product looks and feels inferior (compared to Milgard or Certainteed) and their installation lacks tight details (your luck with the installation crew may vary). They also do not include interior casework and trim. After all, finishwork is what makes windows look fabulous. Or not. My neighbor used them to replace his 11 windows and a sliding glass door at a cost of $11k. Not cheap, but for a no-sweat one-stop shopping solution, it's one big easy check to write.
Viplex has a similar offering (retrofit + installation) and claims superior performance. Their samples do show insulation-filled sash sections. However, I wasn't too thrilled about certain design details, like asymmetrical sashes (Milgard's vinyl is like that, too) and tense operating mechanisms. Their sales are commission-based. The quote I got for five tiny easy windows was $4k — seemingly a very comfortable margin for error!
Renewal by Andersen also came to the house, but way back before I installed the bow window (early July 2002). The salesman knew nothing about
Andersen's regular line of windows and doors. Apparently they're a different division that caters only to residential retrofits, offering vinyl, wood and clad windows with complete installation and cleanup. His product samples did show the same Andersen quality, which is always excellent, but the salesman (a very "experienced consultant" as he boasts) failed the acid test I put to him: describing how to
support the overhanging bow window and how to finish the
area above it. He just didn't know much about window installation. He couldn't even write me a price quote, verbally uttering "$5k to $9k or more," and claiming they're a "high quality" company far superior to any other vinyl window replacement company. That's scary!
Home Depot's stock vinyls, on the other hand, are incredibly cheap, both in price and quality. There 3020 slider (they don't have the sizes I need anyway) sells for less than $90! They might be okay for garage or storage sheds.
So it came down to finding the best price on the Certainteeds. It was reassuring that their custom-size prices were very similar to Milgard's commons, with some vendors matching them dollar for dollar. It was easy shopping for me since I was seeking merchandise only, not installation. After getting 12 quotes on the three windows I need (4020 glider, 3020 awning, 2020 awning) ranging from $670 to $1,100 for Certainteed and $695 to $887 for Milgard, I went with the lowest bidder:
Allied Building Products in Santa Rosa (CA). It was an hour's drive for me each way, but $670 (counting tax) for three custom sizes was a fantastic deal.
 Now for sizing and detailing purposes, it helps to have a sample section of both the new window and your old frame to study. My local Certainteed showroom was nice enough to give me an older section sample, which has a profile similar to their current product line, and I fabricated a sample of my existing window frame with a piece salvaged from an earlier project. Detailing the gaps becomes critical for performance and quality of the work. For the sill contact I cut a sloping wood filler plate that went into the aluminum channel. Extra-long cabinet screws fastened the jambs (not appropriate for every type of window). Caulking was applied generously to both the opening and the window unit before tilting up. All gaps were then filled with batt fiberglass insulation before interior finish jambs were fastened. I ripped them (clear pine) to match the proportions of the sash. Finish details like that add tremendous quality to the window as a whole. Now for sizing and detailing purposes, it helps to have a sample section of both the new window and your old frame to study. My local Certainteed showroom was nice enough to give me an older section sample, which has a profile similar to their current product line, and I fabricated a sample of my existing window frame with a piece salvaged from an earlier project. Detailing the gaps becomes critical for performance and quality of the work. For the sill contact I cut a sloping wood filler plate that went into the aluminum channel. Extra-long cabinet screws fastened the jambs (not appropriate for every type of window). Caulking was applied generously to both the opening and the window unit before tilting up. All gaps were then filled with batt fiberglass insulation before interior finish jambs were fastened. I ripped them (clear pine) to match the proportions of the sash. Finish details like that add tremendous quality to the window as a whole. |
 | One of the nicer features on the Certainteed is the cam-lock. It pulls the two sashes together tightly and securely. Milgard's pinch latch is less secure, and I've heard is more prone to breakage. 
For this window I decided to bring back the stool and apron detail since it was at eye level. |
|  |  | I think the substantial proportions of the sashes require that left and right be symmetrical. Certainteed was really the only choice.
 Interior wood shutters from Smith+Noble finished it off and further improves the window's 0.38 U-factor. Total price as shown is $392 ($165 window + $46 casing & supplies + $183 wood shutters) after tax. Yes, the interior wood shutters was more expensive than the window itself! Interior wood shutters from Smith+Noble finished it off and further improves the window's 0.38 U-factor. Total price as shown is $392 ($165 window + $46 casing & supplies + $183 wood shutters) after tax. Yes, the interior wood shutters was more expensive than the window itself! |


 Because of the stock door panels, my primary concern was dimensioning the width. I had to build the face-frame first. Then, after confirming dimensions on the computer (and reprinting the drawings), the top and bottom panels were cut. It's a reverse order of fabrication, cabinetmakers will tell you.
 Every joint was biscuit-glued. The rear panels were additionally strengthened with carpenter's screws (not the usual wood screws) that really grabs plywood (purchased from the local Rockler store). Perhaps an overkill, but better safe than sorry. The finished 19"-deep box was then screwed to three wall studs with nine 4" cabinet screws (also from Rockler). It can hide a laundry basket!
 Moderately fast-growing evergreen tree to 35ft with a 20ft spread. Can be sheared to a hedge, 5-8ft tall. Fragrant, yellow flowers open in spring on unpruned plants. Foliage color is yellow green to medium green. Best grown in full sun to part shade. Regular water until established. Fertilize in spring with a complete fertilizer. Develops a handsome gray, curving trunk when grown as a tree. Densely foliated in either form.


 Pittosporum tenuifolium (Black Mapou or Tawhiwhi or Kohuhu)
 I love awning-type windows in a bathroom. It allows full ventilation even in light rain and hardly compromises you in inward view. These Certainteeds have dual-glazed obscure glazing to boot. Once closed, they're completely weather-tight and fully insulating.
 Old aluminum slider shown above. Sash was removed, but frame was kept. Wood stool and apron was removed and rebuilt.
 Pittosporum undulatum or Victorian box or Cheesewood.
 My jasmine seems to be developing a fungus. It was planted about 3 months ago. I have no clue what is causing it or how to fix it.


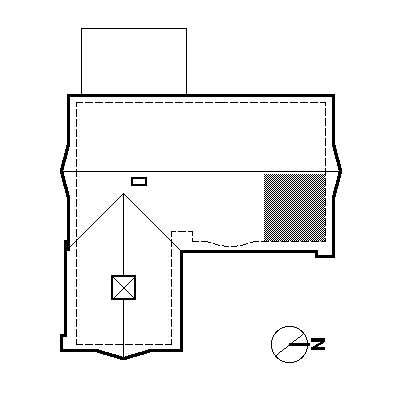
 I found this dimmable fluorescent downlight at EFI (for $67). It comes with a 2,700K-degree TCX 4-pin 20W bulb. The room is about 12 feet by 12.5 feet, so I installed four, equally spaced by their illumination circles after mapping out the ceiling joists. For a flush, tight rim at the ceiling, I installed them using stiff wire batt insulation supports (about four rods per fixture) pressed downward on the housing lip instead of nails or screws. The only drawback to this method of fastening is that the fixtures would drop when, or if, the ceiling wallboard ever gets pulled off the ceiling joists. But that possibility is just too remote to worry about.
 Switching had to be located at both doors. One location got a standard 3-way flat-rocker switch (the style that I'm pursuing throughout the house), the other an expensive dimming slider. Unfortunately, the only dimming flat-rocker style 3-way switch I found produces a slight buzz at less than full brightness. It wasn't designed for dimmable fluorescents. The only recommended dimming switch for this particular fixture is not 3-way compatible, nor flat-rocker style. I had to compromise. The buzz at the switch is noticeable only when the room is very quiet.
 While everything around it is becoming very green, these shrubs seem to be slowing down. The two nearest the house (foreground) seem worst. They're still the same size as when it was first planted!
  A decent profile was created from a Riviera casing, a rounded corner moulding and the extended jamb. It was the closest match to the Carolina casing that I've been installing elsewhere in the house. (Kelleher Corporation has excellent online moulding profile information) This semi-custom profile was needed because the required depth of the interior wood shutters was beyond the thickness of a single casing. I also decided to forego the typical stool and apron detail for this window because the shutters would dominate the look, and there would also be the chair rail.


 Cheap knotty pine was fine for this location because of the good overhang. I repeated the bullnose sill using redwood. The outer layer of side and top trim (it's a two-layer design) was biscuit-glued at the corners and installed as a frame, which greatly reduces the chance of the seams showing after several seasons of expanding and contracting. Installing a "frame" assembly like this for trimwork is always better than nailing them one piece at a time.
 So with a coat of primer and two coats of exterior enamel (and after double-caulking all seams), the final elegance came shining through.
 The old unit was typical of 60's construction — aluminum-framed, single-pane and a cheap slider. Like all my original windows, it was drafty and corroded. Heat loss was a big issue, general operability was another. It looked and felt terrible, too.
 Luckily I had wood siding on this facade. A circular saw with a general-purpose blade was as fancy a tool as I would need. Like for the bow, the siding here was "surgically" removed down to the existing felt paper. This type of window replacement is more like new construction than retrofit, so every part of the old window was removed, which meant pulling out the nails at the original fins. The original felt, however, was kept as intact as possible. Exposure to bare studs at the rough opening was necessary for shimming and nailing of the new unit. Sheathing need only to be cut to the opening.
 Unlike the bow however, installation and waterproofing for this flat unit was quite standard:
 It's looking okay in the spring with all the stalks turning bright green. But it has been in the ground 16 months. Does it really take that long?
 Pittosporum undulatum or Victorian box or Cheesewood.