 Street-side post has been wrapped with cedar. Previously I had referred to this as the "bollard," which still makes some sense -- it's protecting the shrubs from being run over by vehicles! Click on the image to see an earlier progress photo.
Sep 14, 2006
Cedar post
Street-side post has been wrapped with cedar. Previously I had referred to this as the "bollard," which still makes some sense -- it's protecting the shrubs from being run over by vehicles! Click on the image to see an earlier progress photo.


Sep 7, 2006
9-month Brisbane box
 This tree is really shooting up there. I thought the dirt at this location was too poor, but apparently it thrives in most any soil as advertised. I've been watering it liberally once a week and trimming off a small lower branch each time, which hopefully signals it to grow upwards on top. Click on the image to see how it looked when first planted.
Lophostemon confertus
Aug 31, 2006
Totally re-covered
Roofing is all done. All removed bitumen (incorrectly installed by roofer) has been taken to the dump site. Now the remaining work below can be finished at any time because it's weather-protected.
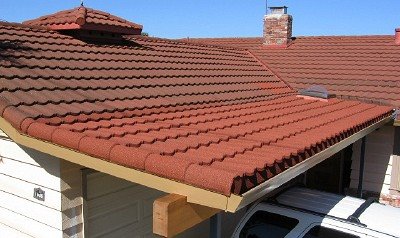
Aug 26, 2006
Vented soffit
 Venting is often not necessary at a soffit where there's no insulation, but it doesn't hurt to have it. Enclosed wood can rot or grow mold. In my case I've chosen a flat smooth material with clean edges to match the proportions of the beam, so the screened vents actually add some interest. Before installing it, I sealed off the lower gutter at where it goes under the roof deck.
Aug 16, 2006
Porch skylight
Skylight is done. This is actually a very cheap unit. I got it at Yardbird's clearance for $47. It's double-domed (dual glazed) with welded corners and a deep skirt, so not too shabby.
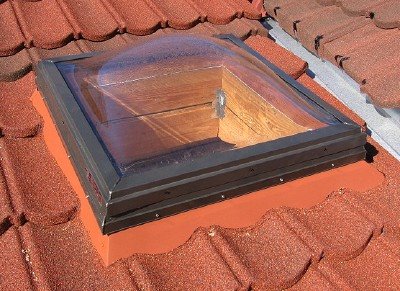 At the contact seam (against the tiles) I laid a bead of Henry #209 Elastomastic and sprinkled some matching Decra granules. Hopefully it won't wash away too quickly!
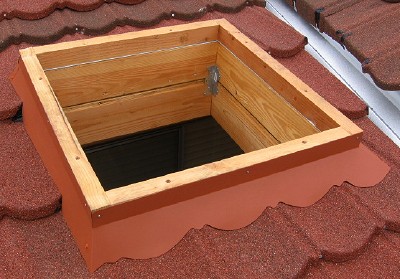 The counterflashing skirt was custom-fit, and, needless to say, required nothing but careful craftmanship, aided again by the cardboard mockup technique.
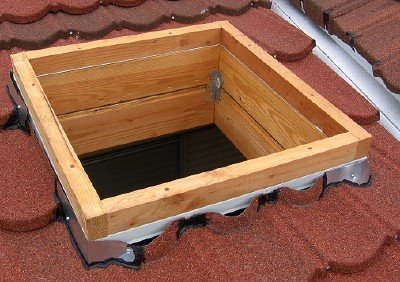 Underneath are similar contour-fitting flashing pieces sealed with the elastomastic. The one-inch dam created all around at the folded edge should hold water from leaking below, which is actually not a big deal because the Grace underneath is the primary waterproofing measure.
Also visible is the white metal drip flashing. It's nailed on top of the 2x6 curb over the Grace. The bare wood on top of it is the two more inches for proper skylight attachment. Next time I'll use 2x8.
 At the contact seam (against the tiles) I laid a bead of Henry #209 Elastomastic and sprinkled some matching Decra granules. Hopefully it won't wash away too quickly!
 The counterflashing skirt was custom-fit, and, needless to say, required nothing but careful craftmanship, aided again by the cardboard mockup technique.
 Underneath are similar contour-fitting flashing pieces sealed with the elastomastic. The one-inch dam created all around at the folded edge should hold water from leaking below, which is actually not a big deal because the Grace underneath is the primary waterproofing measure.
Also visible is the white metal drip flashing. It's nailed on top of the 2x6 curb over the Grace. The bare wood on top of it is the two more inches for proper skylight attachment. Next time I'll use 2x8.
Subscribe to:
Posts (Atom)