Dec 12, 2002

Bow window, part 3

(Continued from part 2.)

Finishing a bow or bay window with proper trimboards always require careful planning, detailing and precise cutting of all the pieces because there are a lot of angles. In fact, computer-aided drafting was essential.


For visual balance, I created a heavy bullnose wrap-around sill to add some "heft." It had to have good shadow lines. The profile took no less than three pieces. With so many odd-angled segments to cut, anything more elaborate was not practical. The half-round piece is a 2x redwood moulded with two passes on the router using a 3/4"-radius roundover bit. The skirt had to be tall enough for appearance as well as to create the proper drip to keep rain water out. The transition at the wall, to the side trim, was especially tricky. I had to use the Dremel tool there.

Luckily I had a large overhang. Framing up to the tail rafters was a lot easier than creating a new roof over the window. Weather protection is always a critical issue with protruding windows. I think mine turned out okay.


Caveats
Pella makes a good product. But they are a direct distributor (except for their limited Proline series, available at Lowes). This means you have to deal with Pella salesmen. For their San Francisco east bay team, I tend to hesitate in recommending Pella. After giving me my fantastic deal, they felt they had to skimp on normal service. Delivery of the windows came five weeks after their promised date (initial order was made in May!). Then the missing cable connection kit was nearly impossible to get. I had to twist some more arms. A factory dent on an interior wood surface became my own fix after waiting two months for nothing. Their only saving grace was a warranty-replacement of two glazing panels after six months with no questions asked. So beware. Or just pay full price.

Price comparisons
A vinyl bow window the same size would cost about $2,000 (Milgard). Installation costs of a bow window like this would be about $3,500, with unknown detail designs. So I estimate the "full retail" cost of the installed Pella bow to be about $6,800. I like to think I saved a ton of money, but I realize this is still a splurge.

Nov 17, 2002

Bow window, part 2

(Continued from part 1.)

The important parts of the detail are the cable connection (to top plate), insulation above the headboard (and below the seatboard) and attic ventilation. Three extra sill plates raised the window to align with those in the rest of the house.

Physically, the raising of the unit into position was purely "Archimedean" — using a standard hydraulic vehicle jack and some custom stacking blocks. Two guys held it from tipping over during jacking. When it was high enough, sliding into place was easy. The existing brick veneer precluded structural support from below, such as corbels or steel L-brackets. This meant the cables are the main support. For added safety, the factory headboard was screwed to the header beam and steel brackets were installed at the jambs.

Nov 16, 2002

Bow window, part 1

The idea for a bow window came to me immediately. I knew I had to get it from day one (but acted on it only three months later). A bow creates the effect of a larger room. It adds a contemporary feel to the whole house. It's stylish. It's dramatic. It's usually found only in expensive homes. And with the size opening I had, I knew it was going to be a nicely challenging project!

My old window measured 10ft by 5ft and was single glazed, which meant it was a huge heat loser. I had to replace it quick. The room will be my office, too. So it was a high priority.


So I decided to twist somebody's arm at Pella to get an architect's deal of the century. Their 9'4" by 4'8" five-panel unit normally sells for about $3,300. It's their top-of-the-line Designer series with integral slimshade blinds (their patented feature) and low-E glazing. The slimshades were the key for me going with Pella. Regular interior window treatments (curtains, drapes, etc.) would otherwise become an unacceptable compromise in the office-type space I was trying to create because it's nearly impossible to drape a bow or bay window without hiding its best features.

Another Pella unit, a double-wide casement measuring 5'10" by 3'11" that can replace my 6ft by 4ft slider in the adjacent room, normally sells for about $1,200.

The deal I got? Both for $2,700. That's a 40% discount. The only catch was that I had to take the smaller window in their Architect series, which meant integral muntins and divided lites. It looked nice, and the same Pella style, but a different line altogether. Divided lites are more traditional looking. Their intent was naturally to showcase their top two custom series (being an architect's home office and all). I figured it was acceptable because the bow was large and different enough that the variation would seem reasonable.


Of course, the good price was just the windows! Installation was not included. It took me, working casually part time, over two months to fully complete inside and out. The toughest part was actually just getting the monster off their delivery truck's liftgate. Luckily I had friends, neighbors, and a couple of hired laborers (on the big dig day) to help me. I made an essential six-wheeled 12-foot trolley on which to put it, which later became the jacking platform.

Nov 2, 2002

Post lamp

A Prairie style lamp was special-ordered for $200. I splurged.

Lighting control is trick. The daylight sensor powers up when it's dark outside and powers down when it's light. However, I didn't want to keep the lamp on all night, even though it uses just one 25W incandescent, which, by the way, is the ideal brightness for these exterior-type lamps. (Lights of America makes an equivalent 5W compact fluorescent with standard twist-on base, available at Walmart).

So I went the full nine yards and got a $30 Intermatic timer switch (from Home Depot). It installs as a wall switch (replaces a standard switch), giving me full control from inside the house. I set the switch to turn on at about 3PM, which powers up the lamp, but the light won't go on yet because the daylight sensor keeps it off until it's dark.

The effect of this combination in switches is that it lights up at dusk and switches off via timer at midnight. Perfect.

Total cost of complete installation: about $420.

Oct 23, 2002

Chimney cap

Scraped off miserably old and failing masonry caulk (by previous owner?!) and installed stainless steel chimney cap by embedding into new mortar bed sloped for drain. Grill opening of 5/8" is spark arrestor qualified for California. Top piece is fastened with stainless nylon lock nuts -- removable for occasional chimney sweeping.

Oct 14, 2002

Lamp post

The location by the tree was also perfect for a post lamp. It was all planned from the beginning. I decided to design and build an AC-powered model instead of one using DC or solar because of the greater selection in lamp styles. I also figured the permanence of an AC fixture would add more value to the home.


Conduits, for AC wire, were laid underground from the garage to a junction box. (Note: Code requires electric conduit to be buried minimum 6" deep if metal, 18" if PVC). The box is attached to a redwood nailer that was set in concrete. Should the tree become appropriate for holiday lights in the future, this convenient junction box can turn into an outlet simply by replacing its cover plate. The two-pour concrete base became the foundation for the post. I got a cheap metal post (from Home Depot) that came with a built-in daylight sensor.

Oct 13, 2002

First tree I ever planted

This tree cost $500 in a 24" box size. I got it from East Bay Nursery, which is one of the best in the area. They have a broad selection of healthy young specimens, including many 24"-box trees. The nurserymen were also helpful, friendly and knowledgeable. Delivery was $45 to my location (they charge by distance, not by quantity). Tax was charged on delivery, too.

Pittosporum undulatum is also known as Victorian box or Cheesewood. It's a fast-growing evergreen that can reach 25 to 75 feet. Mine measured roughly 10 feet at planting. Creamy white springtime flowers are supposed to come in clusters and be very fragrant. But, alas, I have not seen any flowers yet.

Oct 4, 2002

Euonymus shrubs

Eleven 1-gallons shrubs from Home Depot. Emerald Gaiety Euonymus, "a dense, erect branching, evergreen shrub, can be used as a colorful border or foreground planting, rich green, rounded leaves have a pronounced white margin, part shade to shade, 3ft tall, low water once established, low maintenance."

This is the fun part. See excavation.

Sep 23, 2002

Digging through hardpan

Digging through hardpan is never fun. Too bad I didn't think of renting a demolition hammer. Oh well. Instead, I hired a laborer to swing a pick axe. Poor guy. Hope he didn't break his back. He looked strong, though.

This is on the side of the driveway opposite the new tree location, which was luckily much easier to dig. Emerald Gaiety Euonymus will be planted here.


The floor of the trench is practically waterproof, so to improve drainage I installed a perforated pipe — sometimes called a french drain. I sloped mine gradually, running it under the driveway as a solid pipe, then perforated again to a sump bucket that discharges to the street. The direction of flow to the sump is secondary as a backup measure because I also sloped the floor of the trench.

The important parts of a subsurface drain like this is to wrap all the drain rock with soil fabric, not just the pipe, the holes should face downward and it should NOT tie into the roof runoff pipes because of potential backflow. Sloping is not absolutely necessary, but the outlet must always be clear. The type of drain fabric should be the large sheets — available at Truitt and White (but not Home Depot). And rigid pipes are far better than corrugated ones.

Sep 2, 2002

Landscape soil

There's always a cost-to-convenience breakeven point between getting trucked soil or bagged soil for minor landscaping. Trucked soil is delivered in cubic yard quantities, and there's often a minimum for an order, like three cubic yards. It costs about $40 per cubic yard and most vendors charge for delivery. Bagged soil is mostly 2-cubic-foot each, so you have to consider how many trips to make and how many bags can fit your largest vehicle.

I decided the convenience of getting the whole batch at once was worth it. A tree was waiting for it.

Sep 1, 2002

Drain outlet

The drilled hole at the street curb went only as deep as the thickness of the concrete, so the soil under the sidewalk had to be dug out horizontally from the other end. It's a common solution. Breaking the public sidewalk then patching it afterwards would be too much unnecessary work. The ABS (Acrylonitrile Butadiene Styrene) sleeve protecting the opening added a clean professional appearance.

Pipe transition

A short piece of 4" O.D. (outside diameter) ABS pipe fits the curb hole snugly. The transition to the 3/4" PVC (Polyvinyl Chloride) pipe was made with an ABS clean-out plug and threaded cap (all the black pieces in the photo are ABS, the white is PVC). A 3/4" hole was then drilled in the ABS cap for a snug fit with the PVC. Sleeves were cemented to lock the joint. After pushing the PVC pipe through under the sidewalk, the threaded connection created a tight assembly.

Sump pump

The pump itself is a small one that I got second-hand from my brother. It has the usual float switch, inlet connection that fits a common garden hose, and a grounded AC (alternating current) plug. These units are designed to be submersed for a long time. For good measure, my outlet is GFCI (ground-faulted circuit interrupter). The hole in the sump pit for the electrical conduit should be installed as high as possible to keep water away from electrical connections.

Sump pit

A sump pump is hardly ever needed at any distance from a building. They help with discharging water in poor drainage conditions that can cause foundation problems, so they're often installed right next to the foundation.

Nevertheless, I installed a cheap version way out near the sidewalk as a secondary measure because I have super-hard clay soil conditions. The water table here hits the hardpan like it's a waterproof wall and flows around it, causing underground rivulets during storms and leaving air voids when it's dry. Large cracks in the concrete ground are sure signs of air voids below the slab. I suspected poor drainage at the isolated location for the new tree.


The sump pit is just a 33-gallon waste bucket with three holes: drain inlet, discharge outlet, and power conduit. The cover handle is rot-resistant redwood because the whole thing will get buried.

The big dig

Concrete removal was the most expensive part of this project. A simple 9'x15' section of driveway was to be broken up and taken away. However, a utility trench was needed to cross under the driveway for a drain pipe, an irrigation pipe, and an electrical conduit. Concrete cutting was required, not just concrete removal. The trench was eventually covered with paver bricks dry-grouted with crushed granite for appropriate semi-permanence.


Lessons learned
Hiring the concrete-removal contractor should have been better planned. I had to schedule them within just a few days due to friends and hired labor helping me on a specified day. Contractors with diamond-tipped concrete saws were important, too, not just concrete haulers (guys that can just swing a sledge hammer and drive a dumptruck). In addition to the 135 sq ft section and trench, I asked for a 4" hole at the curb (for a drain outlet) and two 14" diameter borings elsewhere (for future post footings).

Concrete removal cost: $800. Ouch.

Aug 1, 2002

Project: office

One of my first major projects is converting the existing living room into an office.

Mar 1, 2002

Project: garage

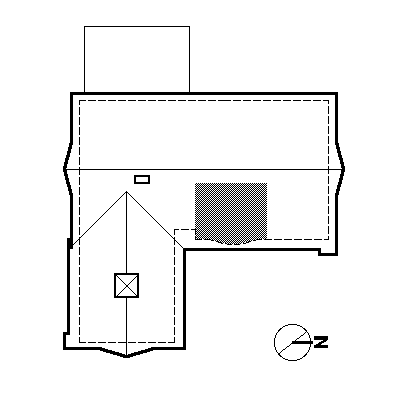
The very first room of the house that needed improvement was the garage -- for workshop space. Shaded area shows the extent of it.

Feb 27, 2002

The abode in question

The house is a 1,714 square-foot, 4-bedroom, 2-bath, single-story ranch with some bay view. Built in 1964, it's fairly contemporary in construction (pre-WWII homes are categorically different; e.g., plaster vs. gypsum wallboard, knob-and-tube vs. Romex wiring). So it's a good first home project. It has good "bones." The seller was the original land buyer, so I'm just the second owner!

Notice the plain facade and weak curb appeal. The interior and rear are similarly plain. There's a lot to do to the house!